How to install psi4 in a Docker container with a jupyter environment

Psi4 is a Python module that can perform quantum chemistry calculations. This article explain how to compile and install Psi4 in the jupyter/minimal-notebook container.
How I came to write this article
I tried to install Psi4 in the jupyter/minimal-notebook container. However, as shown in the question in SO, I could not install it due to UnsatisfiableError. What should I do in this case? Psi4 is open source software. The answer was right in front of me. All I had to do was follow the philosophy of OSS. Yes, I should build it myself.
1. Configure the resources you provide to docker
Building Psi4 requires a lot of CPU and memory resources, so make sure you provide at least 3 cores and 4GB memory for docker. If you are a Windows user and using docker desktop for Windows, you can set this up in the resources section of the docker desktop setting. However, this setting is only required in Hyper-V mode. Because if you are using WSL 2 backend, these resources are managed by Windows. Windows will allocate resources containers need, when containers need them. Please read the documentation for more details.
2. Get familiar with Jupyter Docker Stacks
The jupyter/minimal-notebook I am using here is one of the family of Jupyter Docker Stacks. This docker image provides a jupyter environment. The default user is jovyan, but if you run bash as jovyan, you can't install packages by apt-get because jovyan doesn't have permissions. You can start bash as the root by specifying --user root when you docker run. In addition to this, there are various other settings. Read the documentation to get familiar with them.
3. Start bash in the container
Start bash in the container as root.
$ docker exec -it [container ID] /bin/bash
(base) root$
4. Clone Psi4 repository
Clone the Psi4 repository.
(base) root$ git clone https://github.com/psi4/psi4.git
(base) root$ cd psi4
5. Create new conda environment
Start bash as root. Psi4 only supports until python 3.7, so I should create a conda environment for python 3.7.
(base) root$ conda create -n quantum python=3.7
(base) root$ conda activate quantum
(quantum) root$
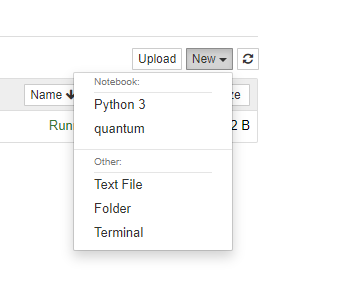
Add a new quantum environment to jupyter so that you can program in the quantum environment.
(quantum) root$ conda install ipykernel
(quantum) root$ python -m ipykernel install --user --name=quantum

Please read this article for more details.
6. Install the packages needed to build
Type the following command to install the packages required for the build. Psi4 documentation lists tools and dependencies required for the build.
(quantum) root$ apt-get update
(quantum) root$ apt-get install -y build-essential cmake clang libssl-dev
BLAS and LAPACK libraries are also required. I used openblas. Uh, do you say I should build BLAS too if I follow the OSS philosophy? Shhh!
(quantum) root$ apt-get install -y libopenblas-base libopenblas-dev
We will also need numpy, networkx, pint, and pydantic, which we will install with conda.
(quantum) root$ conda install -y numpy networkx pint pydantic
Although it is not mentioned in the documentaion, if you read CmakeList.txt carefully, you will see that MPFR and Eigen library is also required. Install them as well.
(quantum) root$ apt-get install -y libmpfr-dev libeigen3-dev
7. Buid and install
It's time to build! Type the following command to Configure and Generate to build.
(quantum) root /psi4$ mkdir build
(quantum) root /psi4$ cd build
(quantum) root /psi4/build$ cmake ..
Let's build!
(quantum) root /psi4/build$ make -j`getconf _NPROCESSORS_ONLN`
getconf _NPROCESSORS_ONLN indicates the number of processors available, i.e., the number of threads available, so this command will build with all available processors. If you are using docker desktop for Windows in Hyper-V mode, this is fine. However, if you use WSL2 backend, Windows will try to allcate all processors your PC has to build, which causes systemc instability and memory shortage. It is better to use half the number of all processors, i.e. the number of cores. I am using docker desktop with WSL2 backend and my PC has 8 cores and 16 processors, so I typed the following command.
(quantum) root /psi4/build$ make -j8
This build takes several hours.
After build is complete, type the following command to install it.
(quantum) root /psi4/build$ make install
8. Specify install directry as python import path
In the default configuration, the binaries, includes, libraries, etc. should be installed in /usr/local/psi4. In order to use Psi4 as python module, it is needed to append /usr/local/psi4/lib to the python import path. You can do this by appending the directry to sys.path each time as follows.
import sys
sys.path.append("usr/local/psi4/lib")
# you can import psi4 from now
import psi4
Here is another way to simplify your Python code. Make psi4.pth file in /opt/conda/envs/quantum/lib/python3.7/site-packages and specify /usr/local/psi4/lib into it.
(quantum) root $ cd /opt/conda/envs/quantum/lib/python3.7/site-packages
(quantum) root /opt/conda/envs/quantum/lib/python3.7/site-packages$ vi psi4.pth
### specify `/usr/local/psi4/lib` into `psi4.pth` and save. ###
If you do this, you can import Psi4 anyweher in the quantum environment.
9. Enjoy quantum chemistry calculations!
If you import Psi4 successfully, you can run the following code and calculate the energy of a watar molcule. Enjoy!
import psi4

h2o = psi4.geometry("""
O
H 1 0.96
H 1 0.96 2 104.5
""")

psi4.energy('scf/cc-pvdz')

>>-76.02663273508807